Most content about concrete scanning focuses on one question: which concrete x-ray machine or GPR scanner to use, which method fits the job, which x ray machine for concrete produces the best results. That question matters — but it only covers half the job.
The other half is what happens after the data is captured. Digital concrete X-ray post-processing is where the raw scan result becomes something the client can actually use. And in digital concrete X-ray specifically, that process is rarely explained in detail.
This article opens it up. We walk through what post-processing means, how it compares to other methods at a surface level, and then go deep into how it actually works in digital concrete X-ray — from the moment the image appears on the laptop to the final report in the client’s hands.
What Post-Processing Actually Means
The term gets used loosely. Most people in the industry consider post-processing as everything that happens after the scan markings are already done on site — the crew has finished, and now the data gets turned into something deliverable. That means taking images and building them into a report, creating AR overlays if the project supports it, or for more complex work, processing data into slides, insights, or a BIM model. That is the common understanding of where concrete scanning post-processing begins.
We define it differently. Post-processing starts from the moment raw data is captured from the device — not after the on-site work is wrapped up. From that point forward, through every stage until the report reaches the client, that is post-processing. It is where the technology and the technique both live.
What that starting point looks like depends on the method:
GPR: In 2D scanning, the antenna produces a signal the technician reads on screen in real time as the machine moves. In 3D scanning, the system builds a volumetric image after the full grid is completed. That signal or image is where post-processing begins.
Traditional Radiography (Cobalt / Iridium): Data is captured onto film that needs to be developed, or onto a CR (computed radiography) phosphor plate that gets scanned into a digital file. Either way, the captured data is the starting point.
Digital Concrete X-Ray: The concrete x-ray scanner’s detector panel captures the image the instant the exposure is made. It transfers to the laptop and is immediately viewable. No development time. No waiting. That image is where post-processing begins.
GPR post-processing is familiar to a lot of people in the industry. Film has been around long enough that most understand the basics. But digital concrete X-ray is still largely a black box — people know it produces images, but what happens after that image appears is not widely explained. That is what we are opening here.
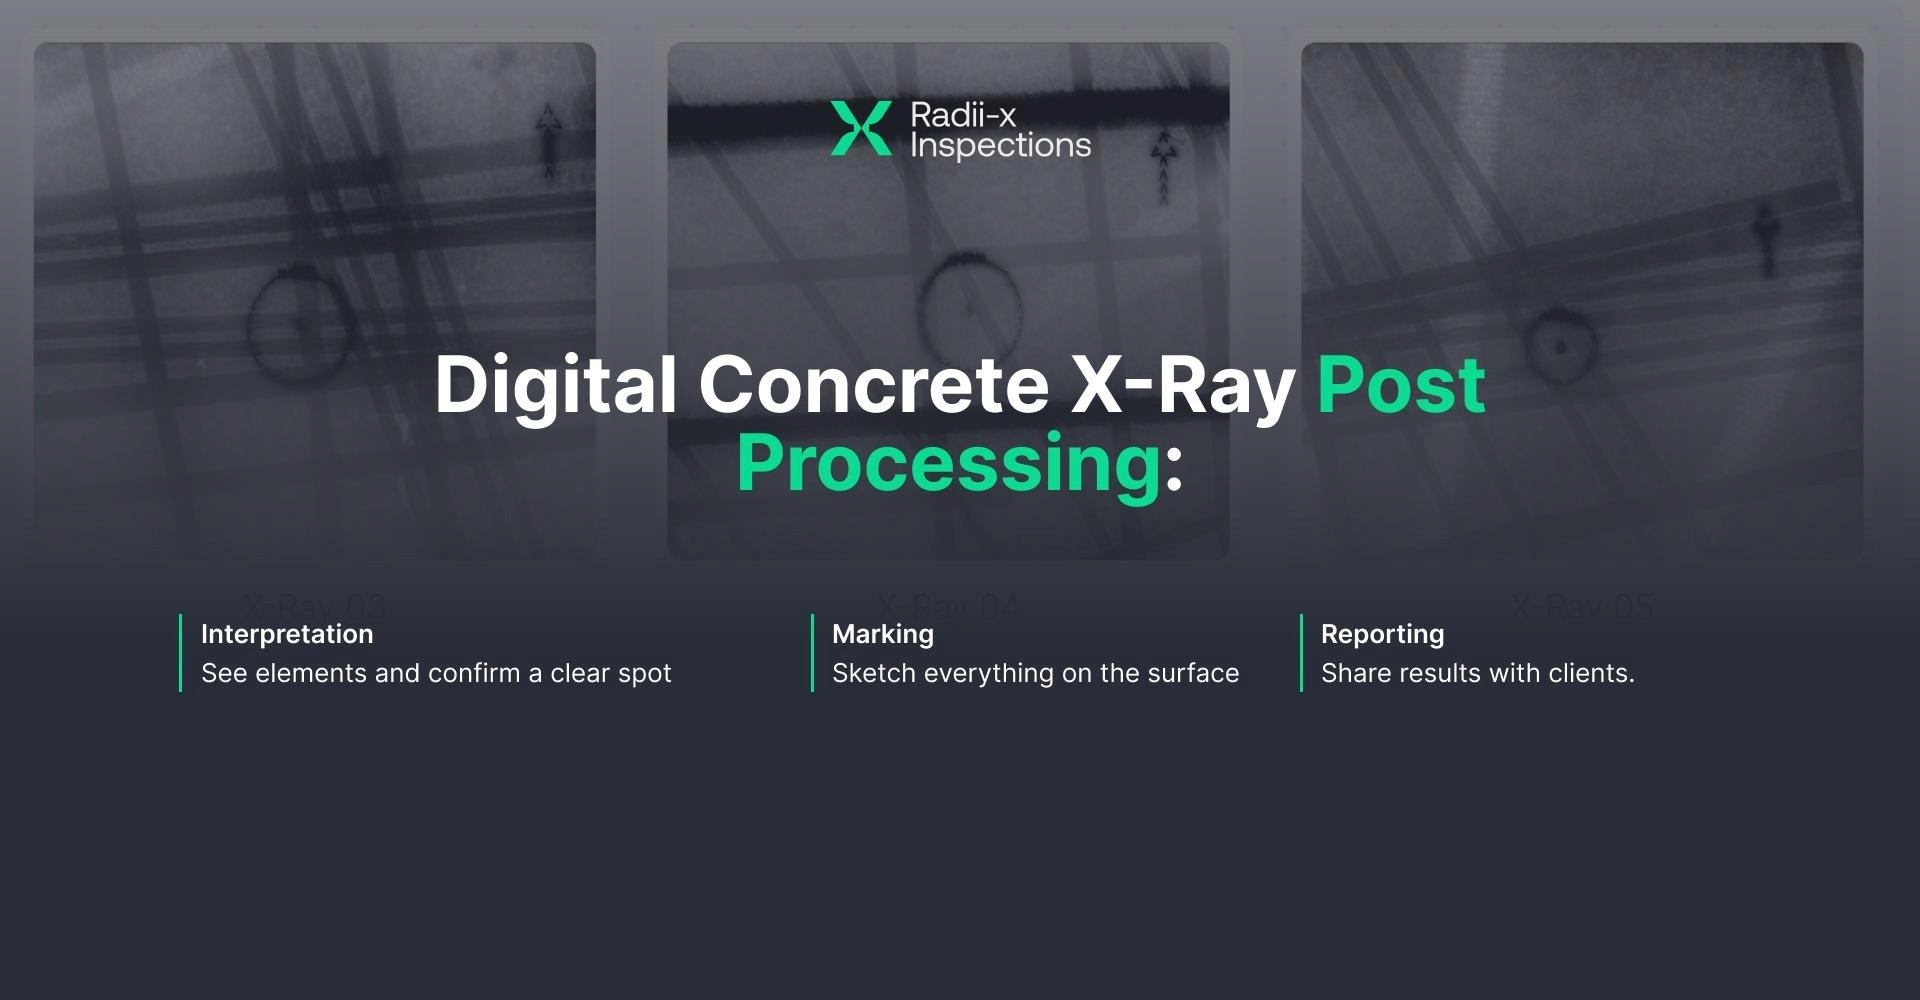
In digital concrete xray, post-processing has three stages:
Interpretation
Marking
Reporting
Let’s go through each one.
STAGE 1 - Interpretation
Digital concrete X-ray is a definitive interpretation method. You read directly from a real image — what the image shows is what is physically there inside the concrete. This is fundamentally different from GPR 2D scanning, where the technician receives signal data and has to translate hyperbolic patterns into real objects based on experience, depth understanding, and pattern recognition. In GPR, interpretation is the hardest and most skill-dependent step. In digital X-ray concrete inspection, it works differently.
Step 1 — Image Preparation
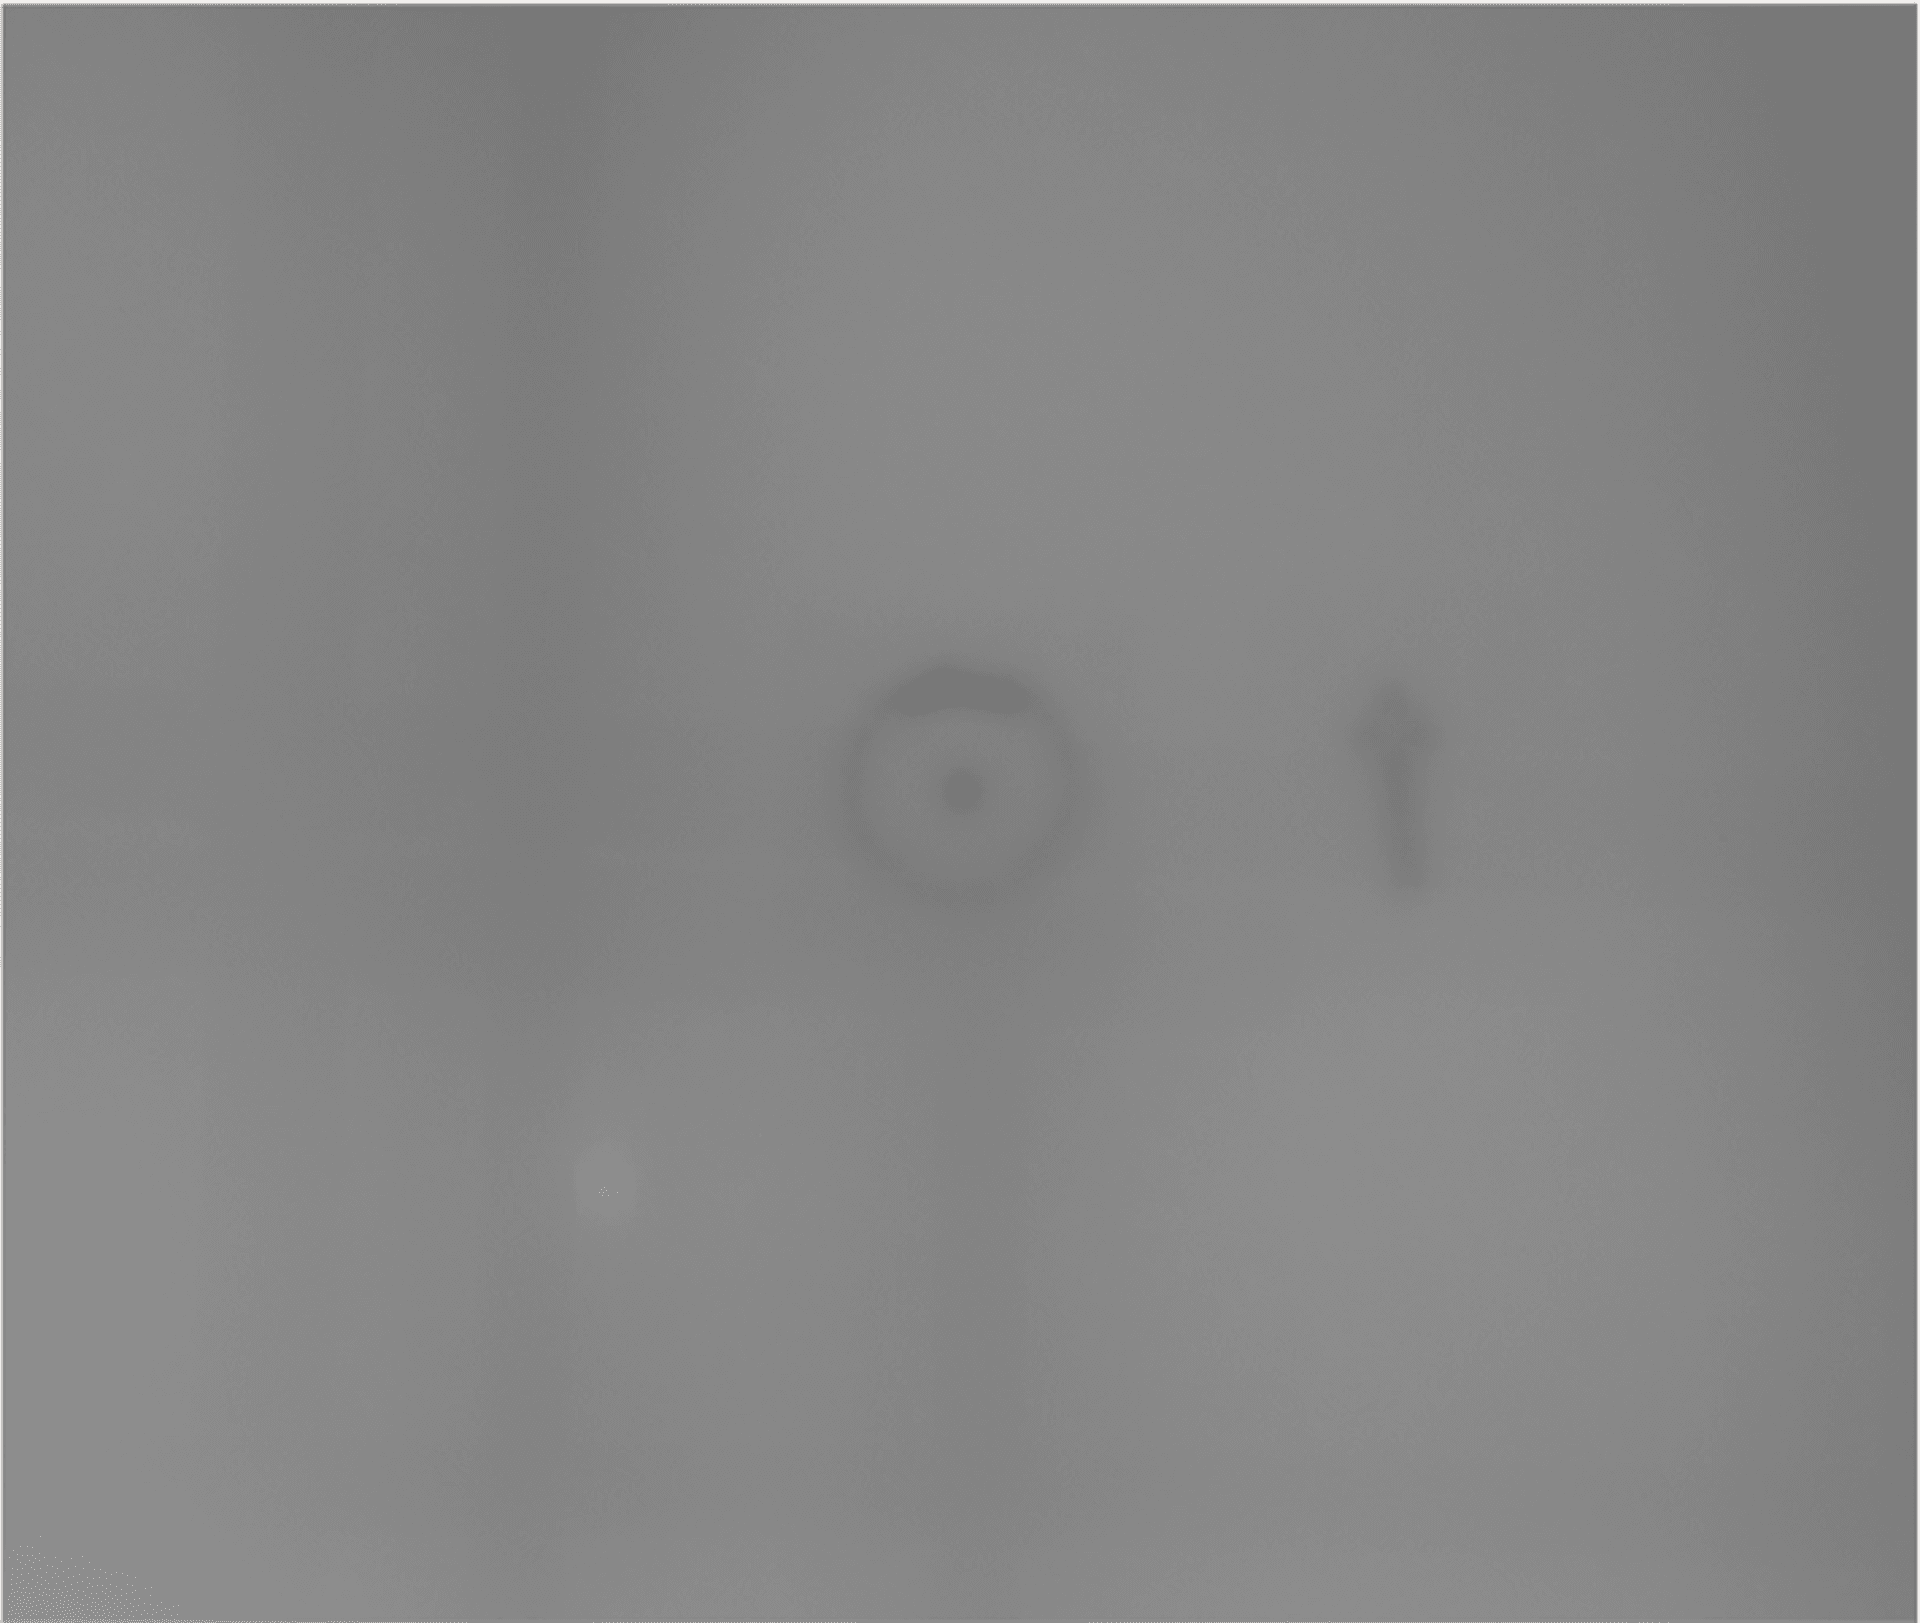
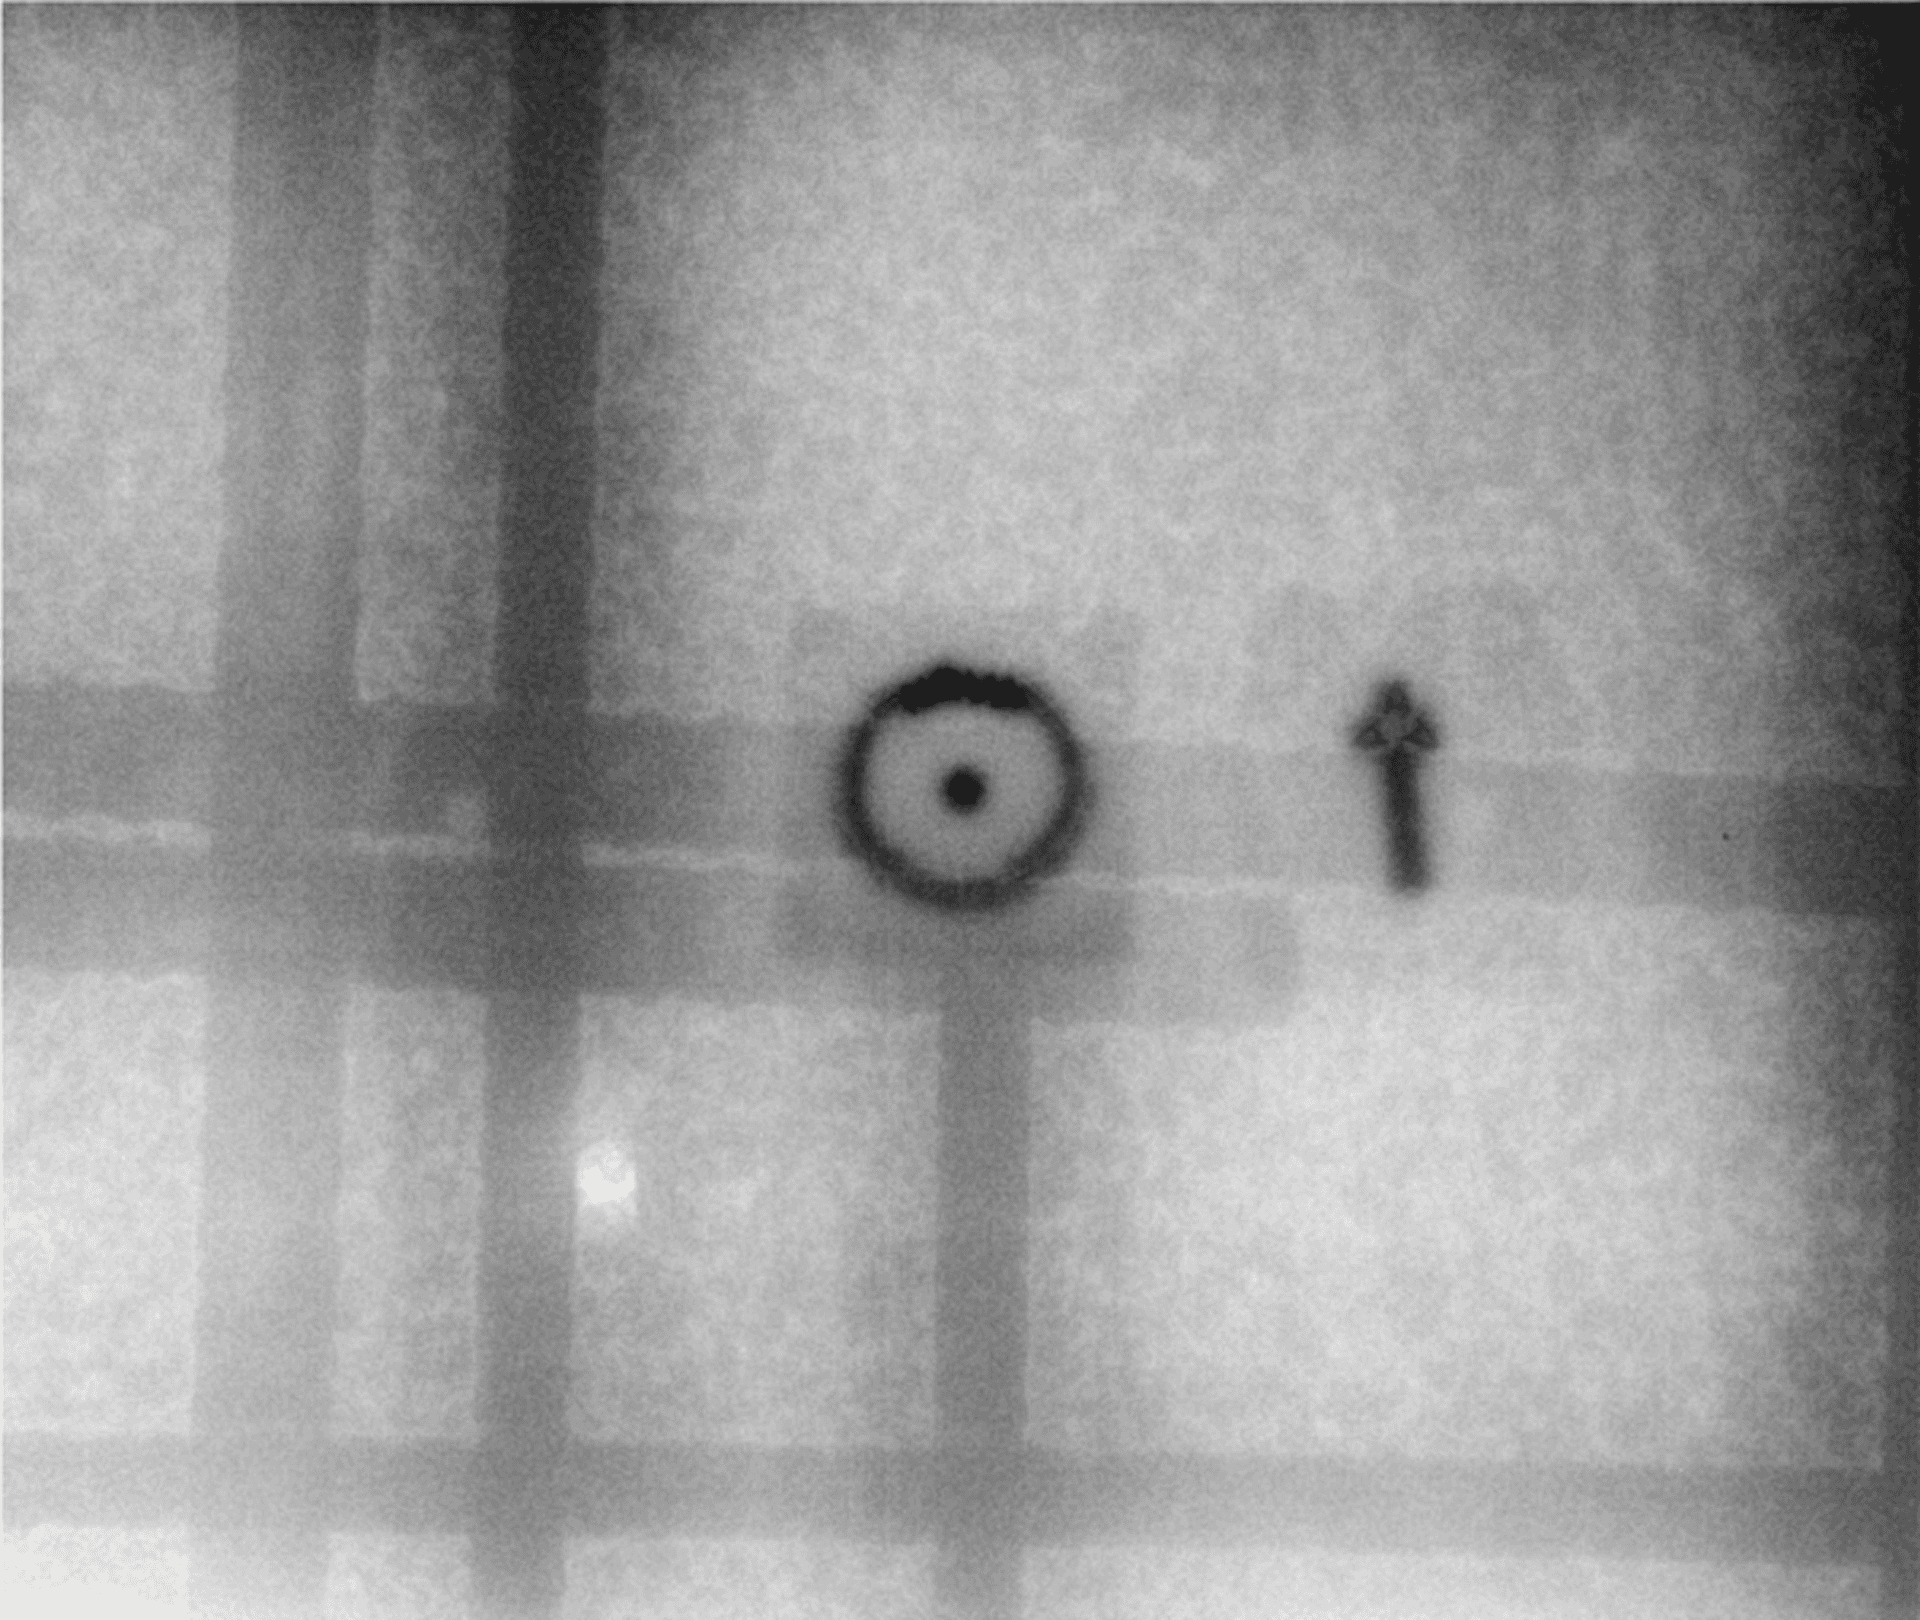
Most digital concrete x-ray equipment and detector panels produce raw image data that needs technical adjustment before it is fully readable. This includes correcting orientation, applying filters, and adjusting brightness and contrast. These are not optional refinements — without this step, important detail can be missed.
In Radii-x software, this step happens automatically before the technician even sees the image. Even if the on-site setup was not perfect, the software adjusts the image. The difference between a raw unprocessed image and a properly prepared one is significant — what looks like noise or low contrast in the raw data becomes clearly readable after processing.
Step 2 — Reading the Image
This is the easiest step — and the biggest contrast with GPR. Elements inside the concrete look on a digital X-ray image exactly as they look in the real world:
Rebar looks like rebar — the rebar xray machine image shows it exactly as it appears in the real world
Conduit looks like conduit — and you can see whether it is empty or has wires running through it
Post-tension cables look similar to rebar but have small bright points inside, from the oil in the sheathing
Voids, honeycombing, metal plates, and Nelson studs are all clearly identifiable
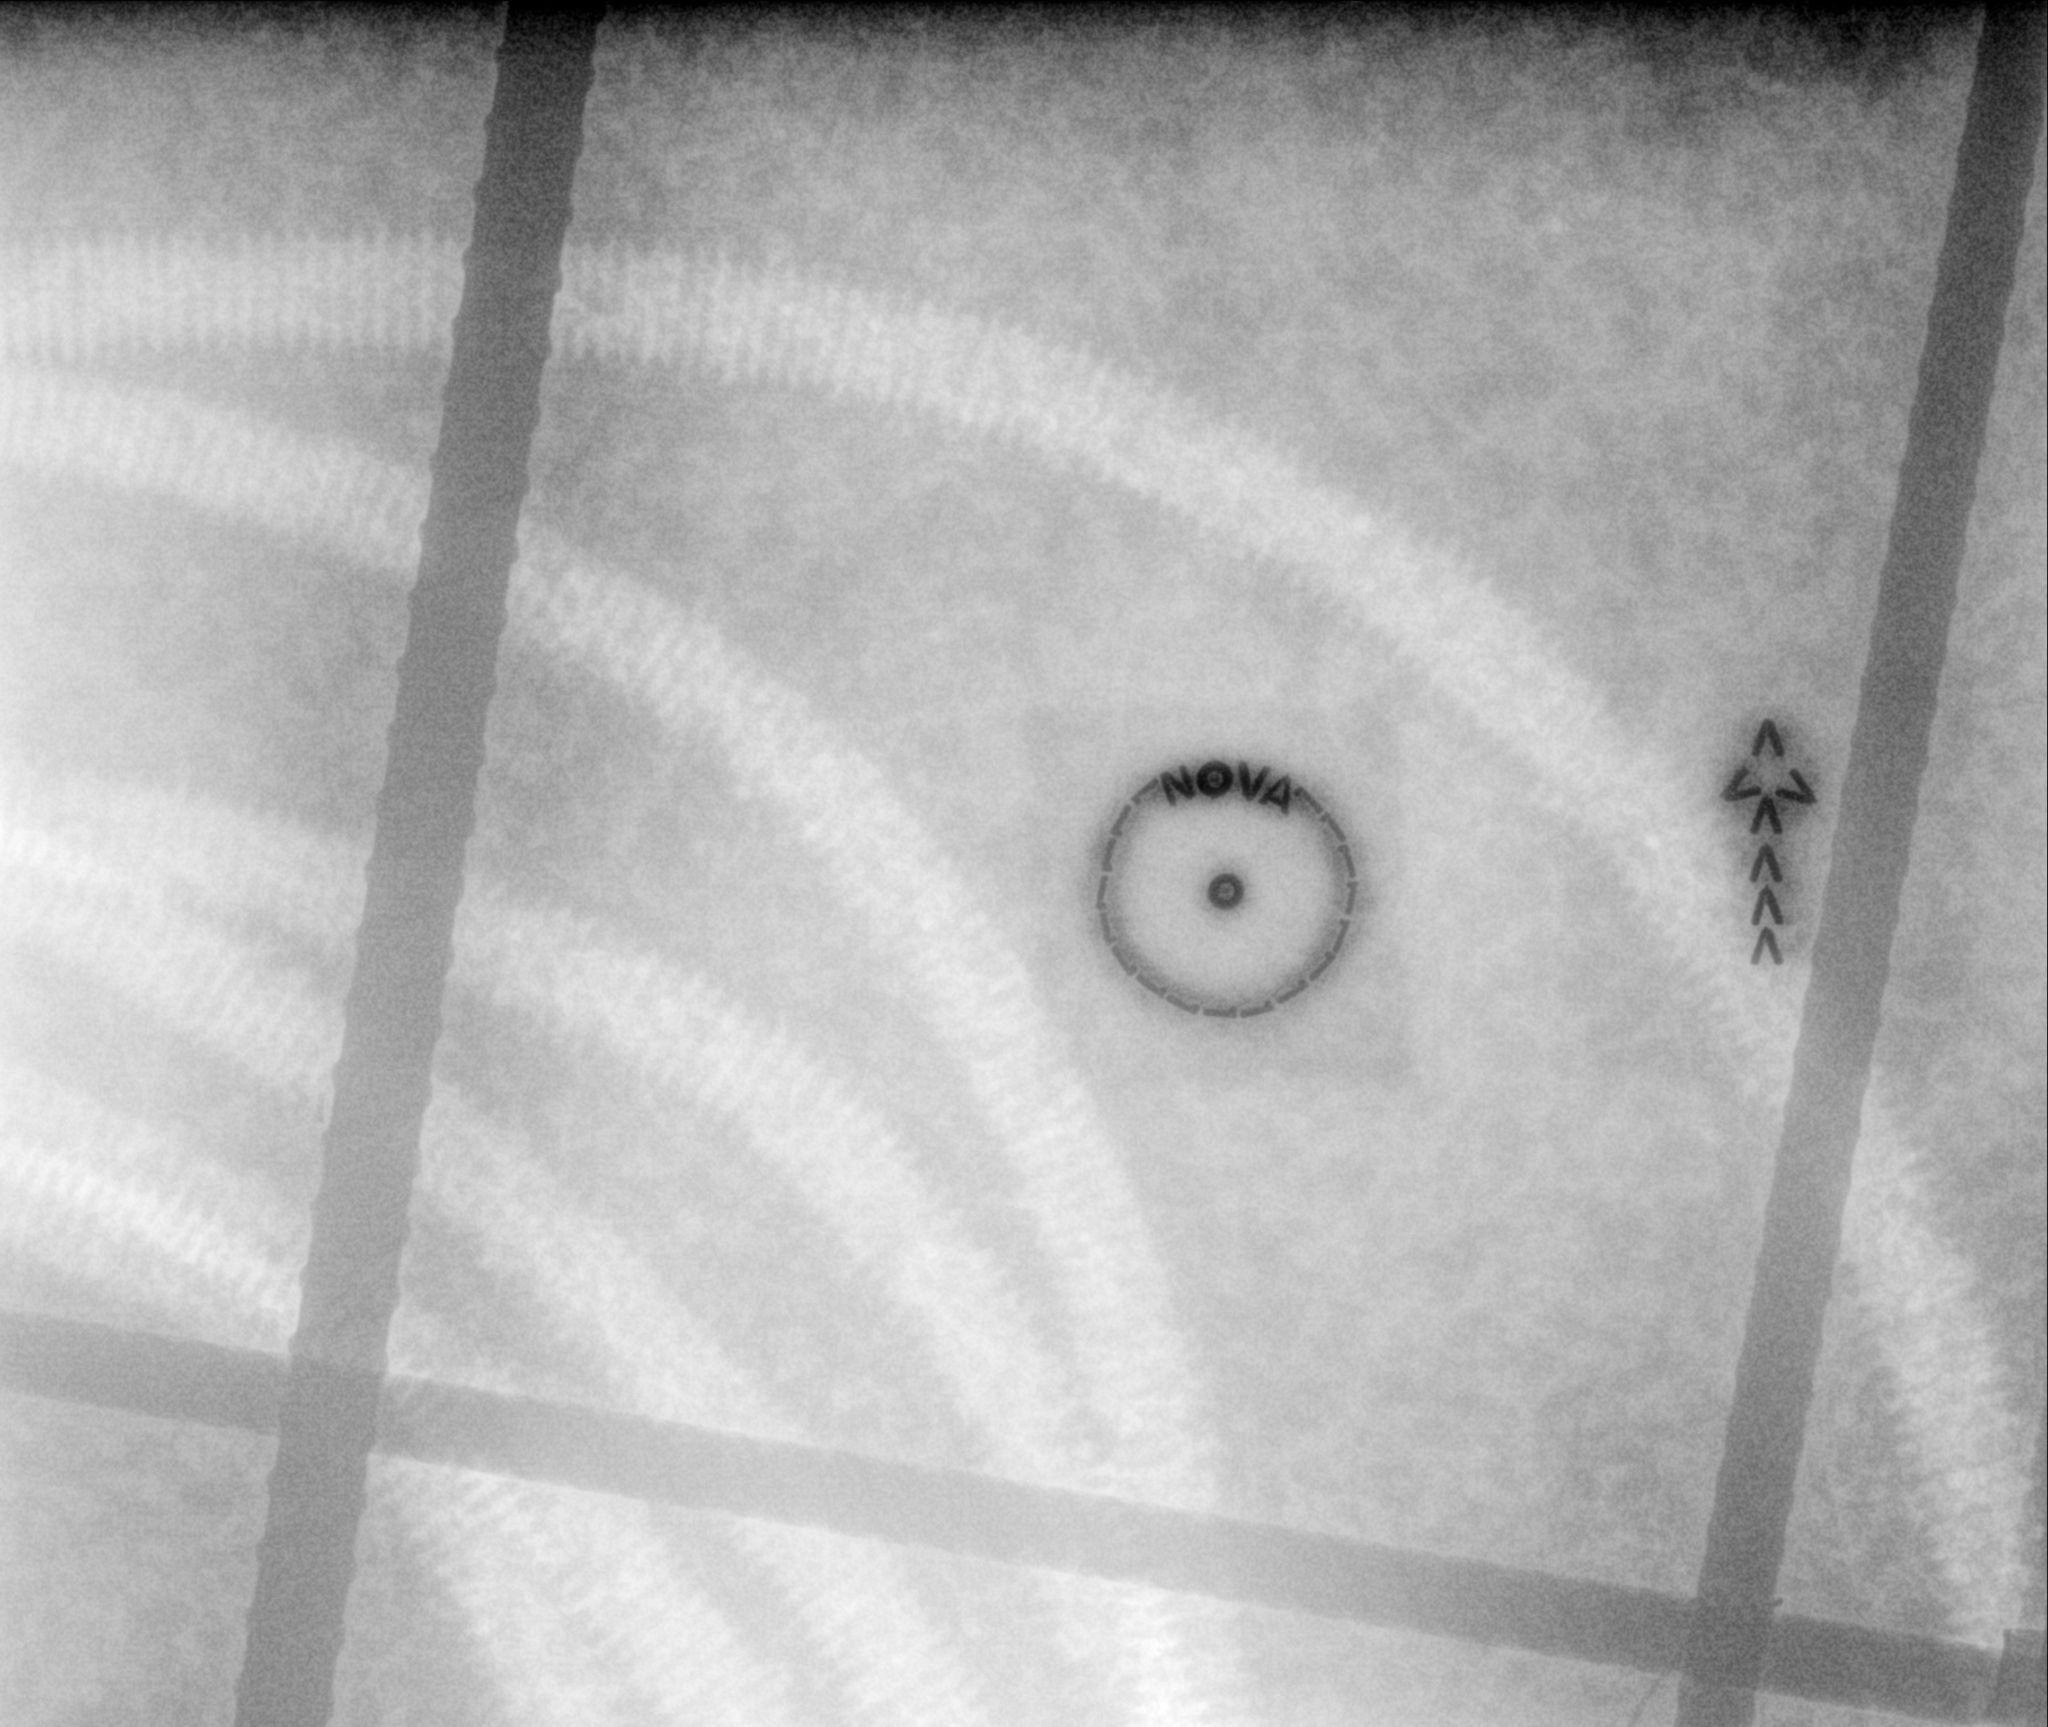
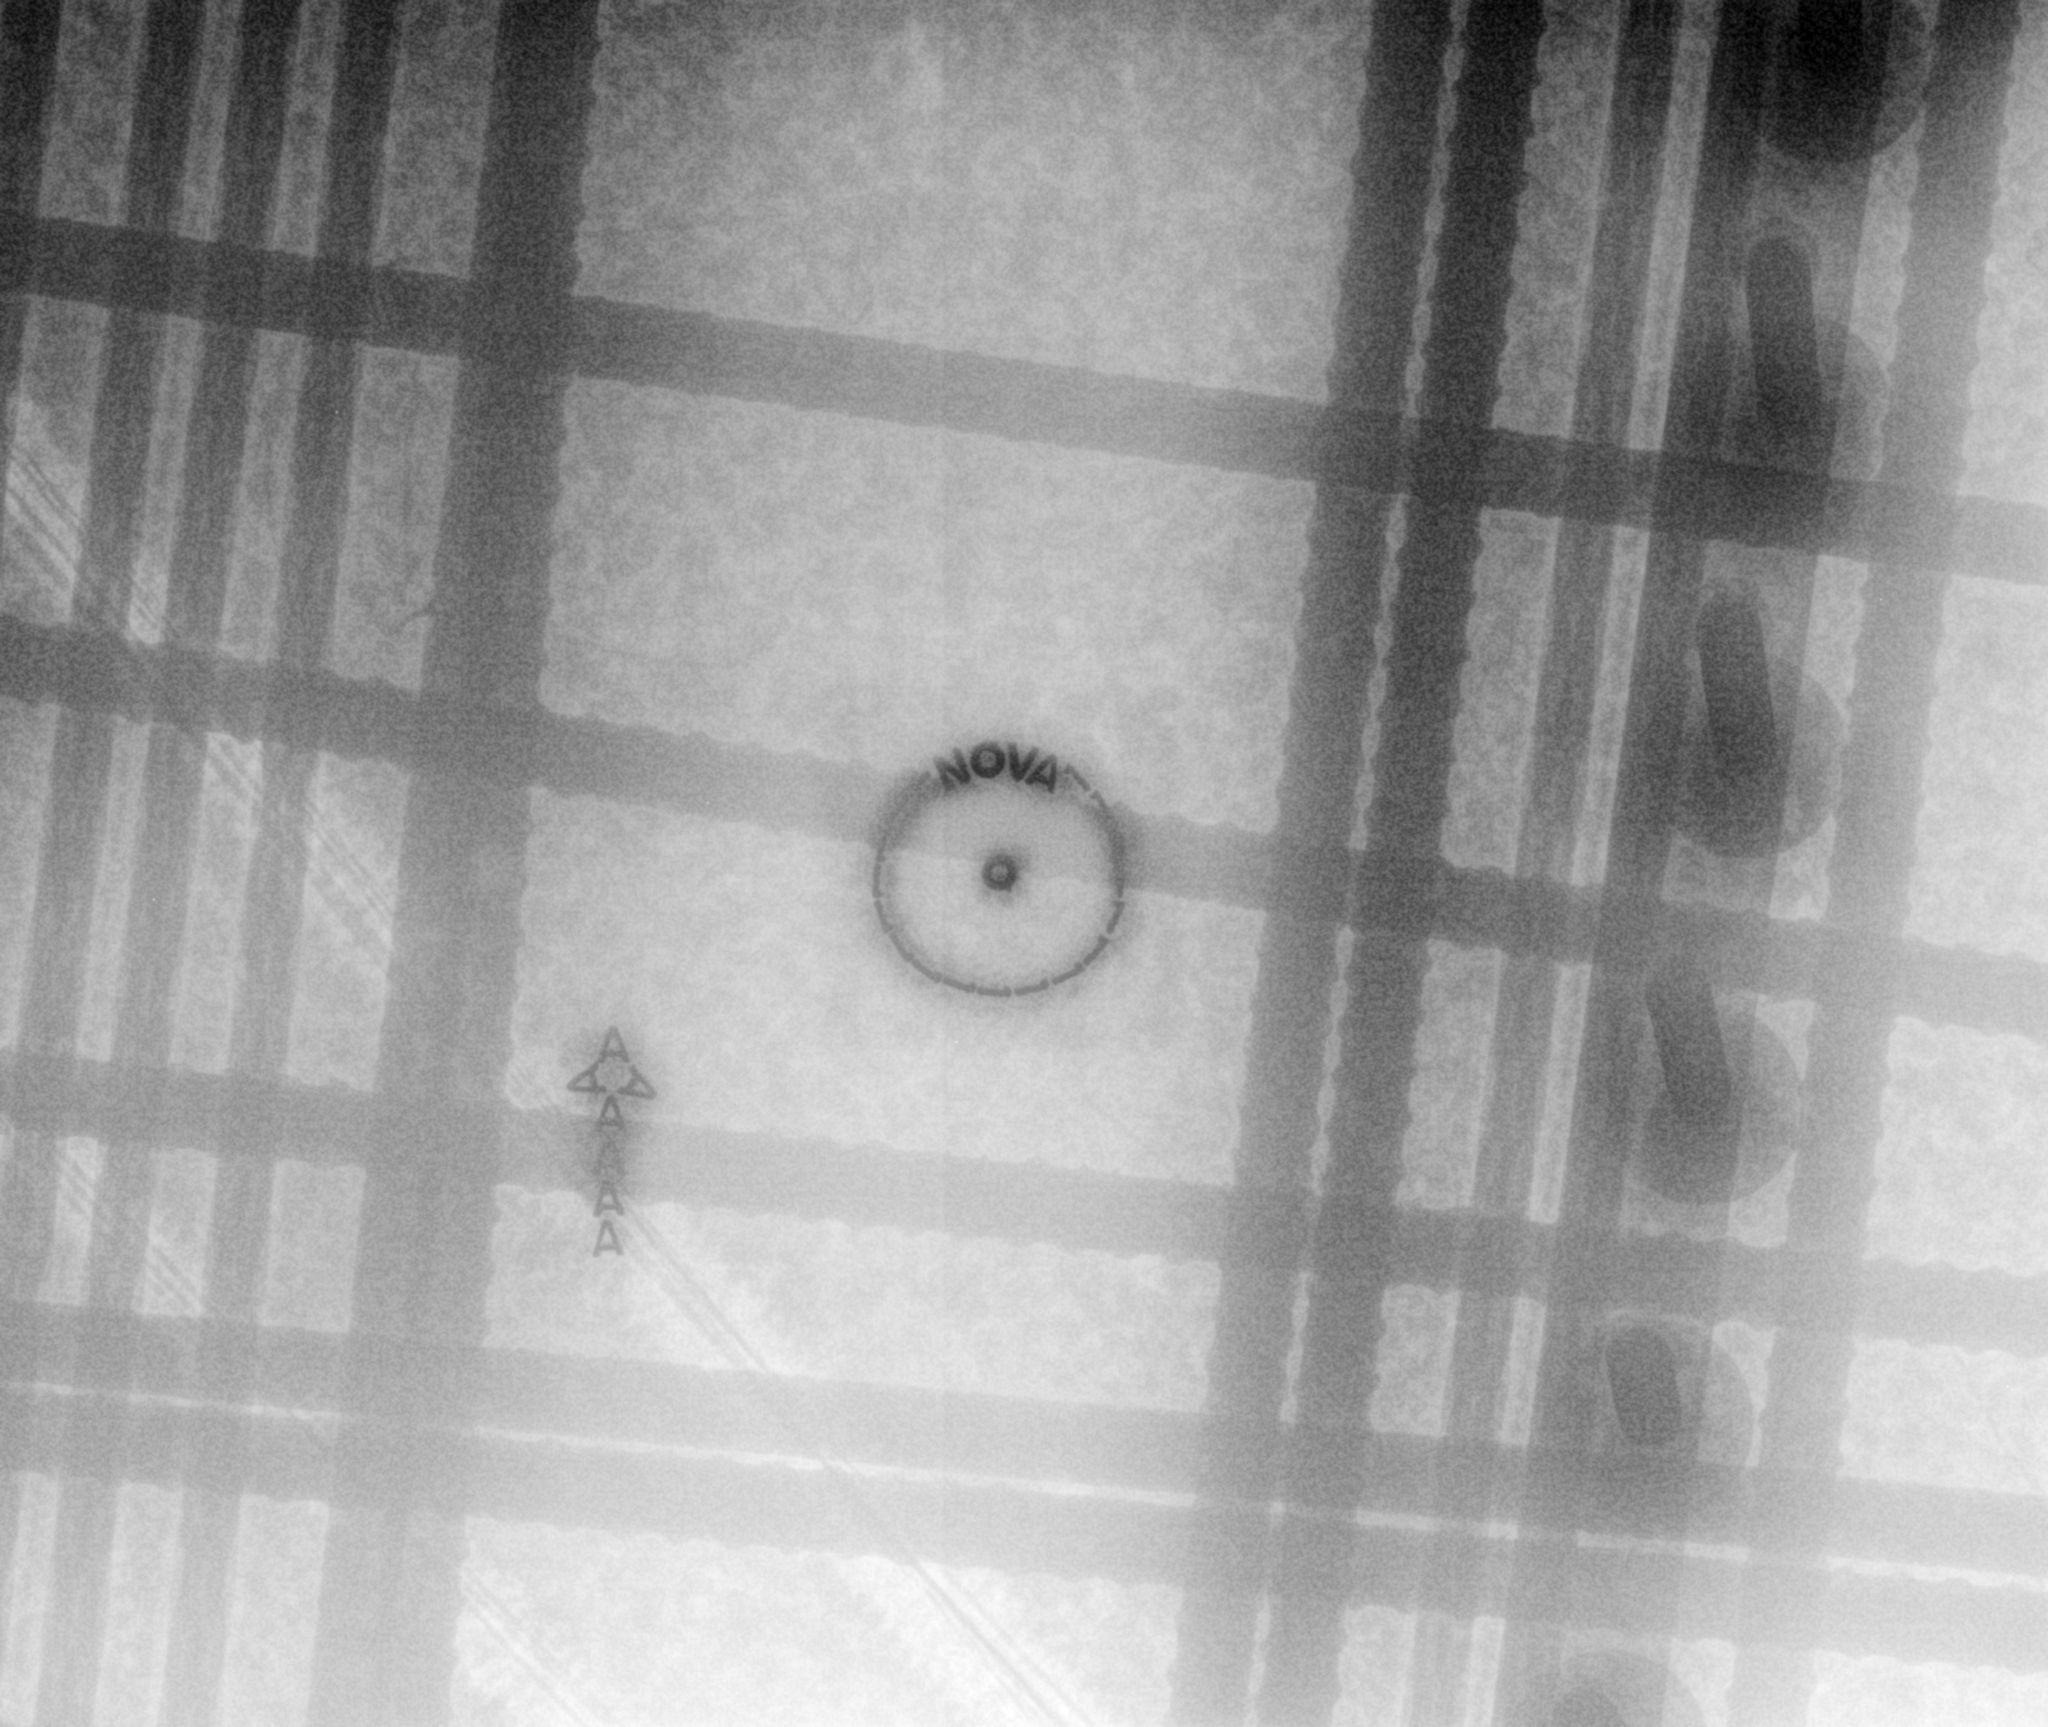
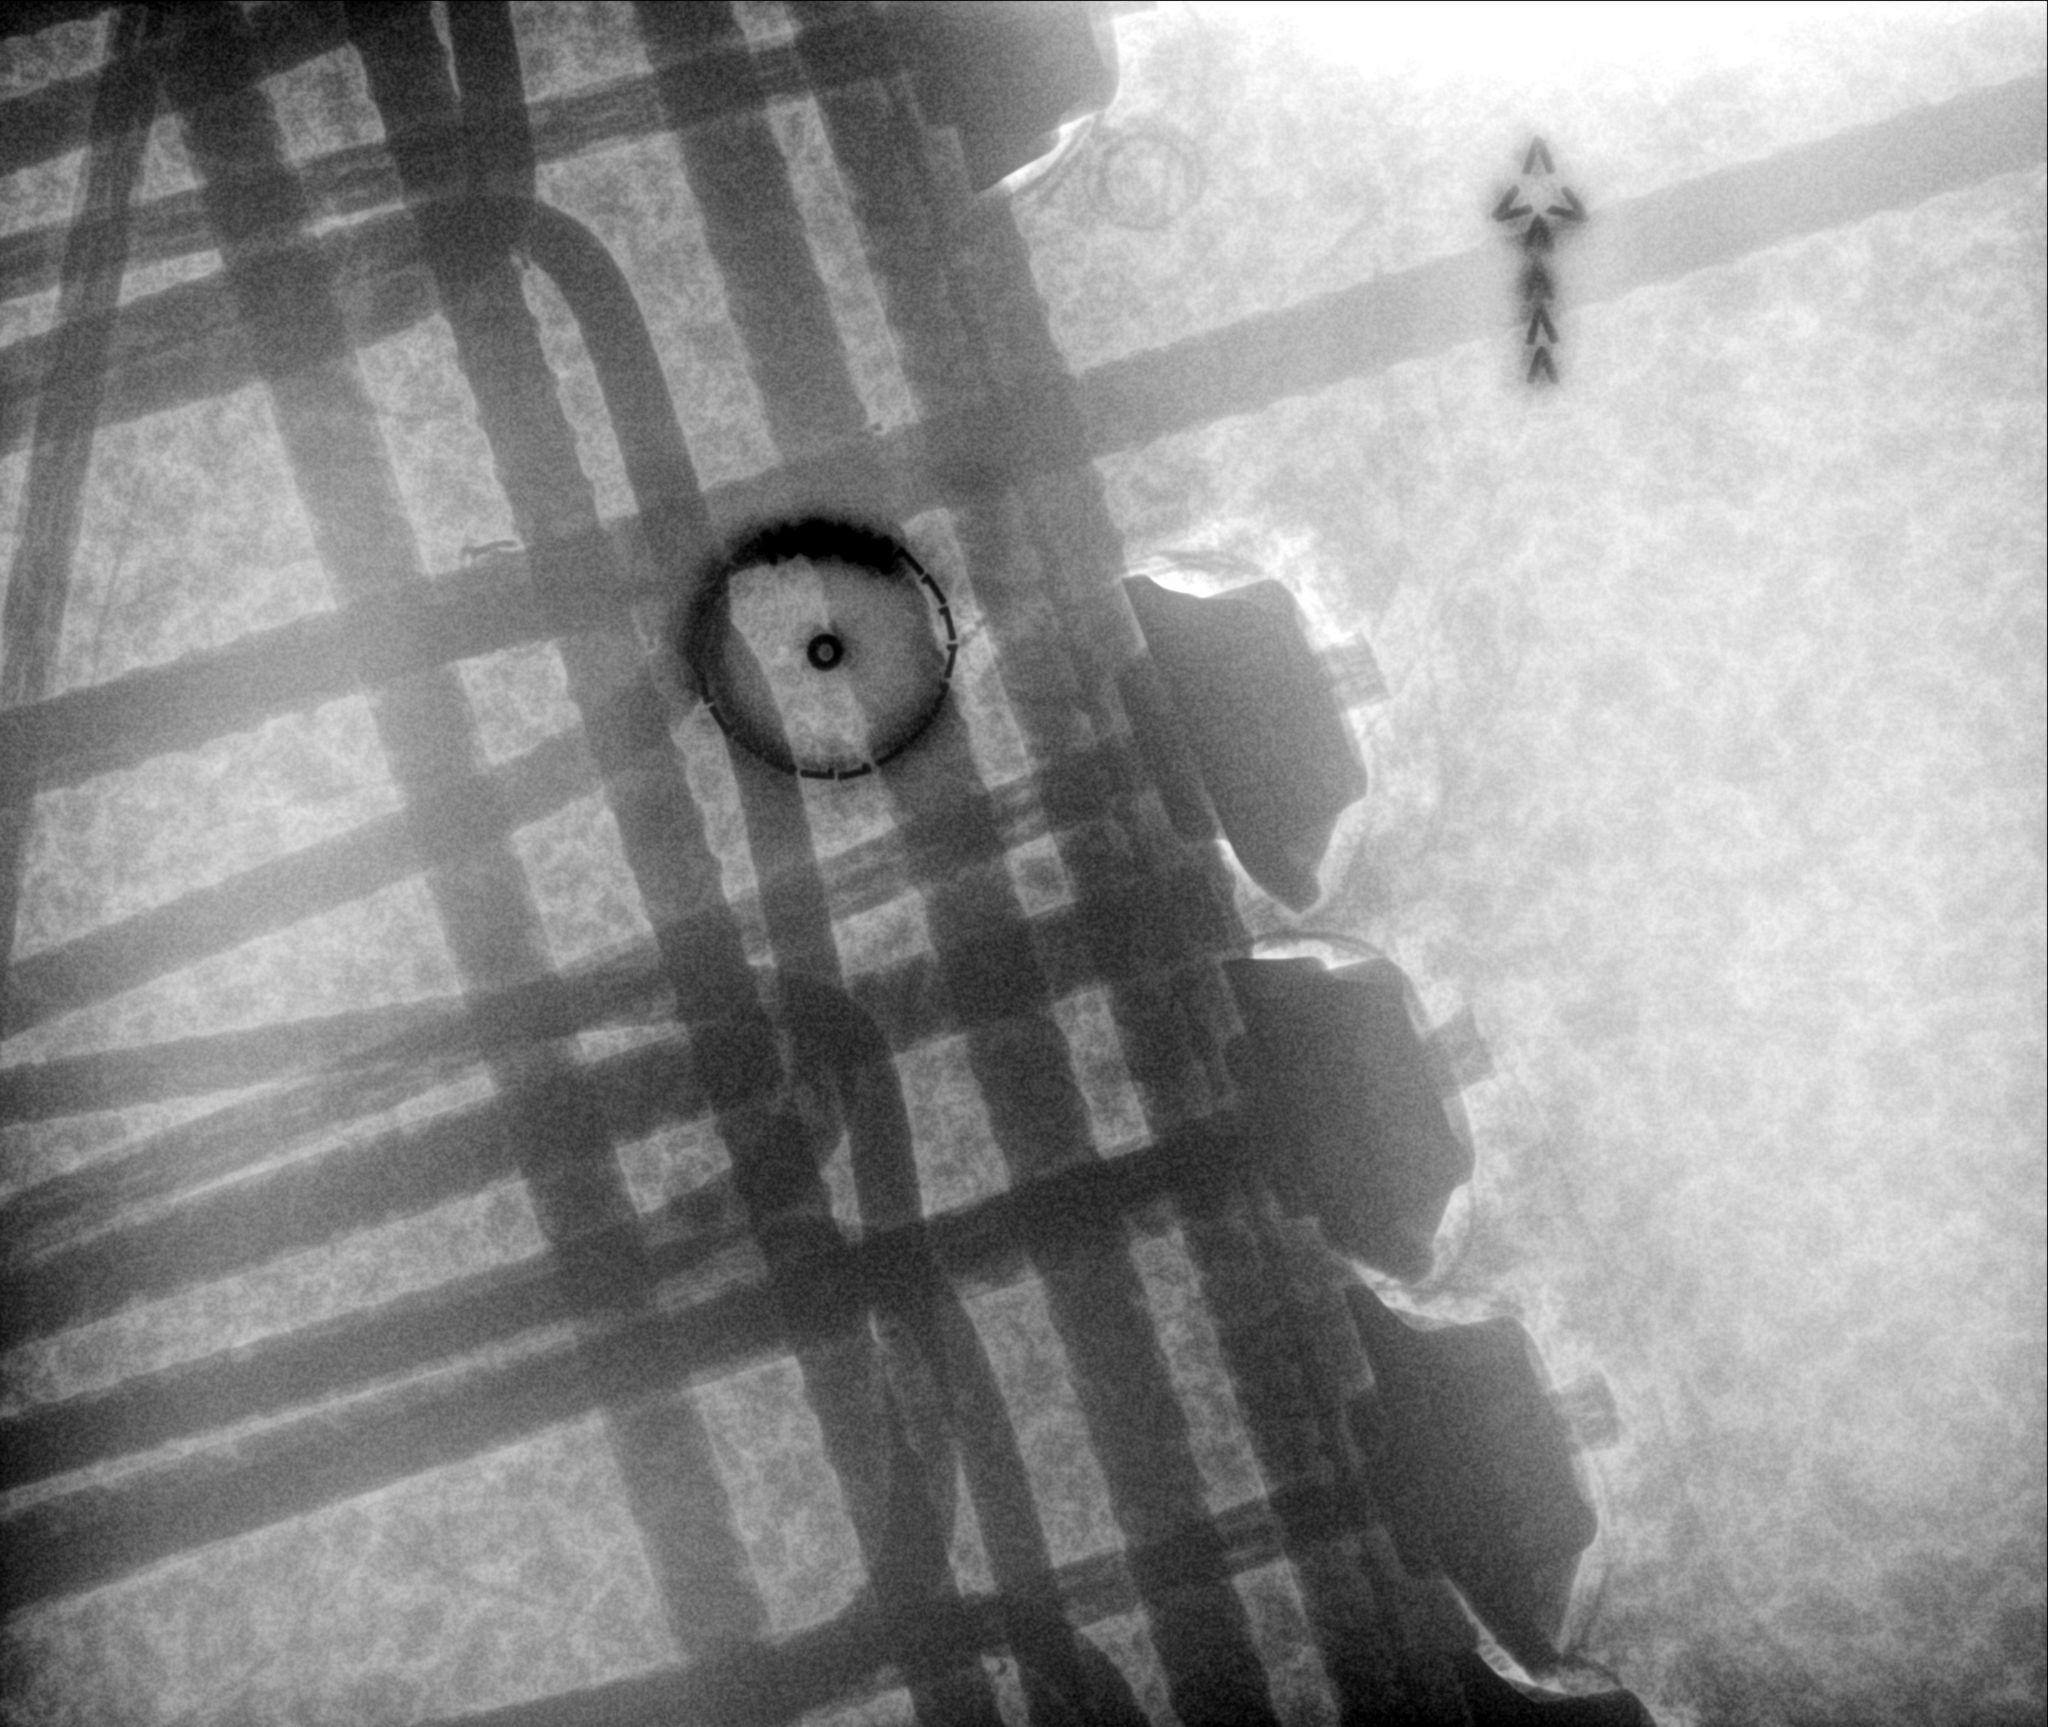
If you have seen these elements in real life even once, you will recognize them on the image. Almost nothing can be missed. This is the opposite of GPR, where reading hyperbola patterns correctly is the most demanding part of the entire process and requires significant training and experience.
Step 3 — Assessment: Does the Core Fit?
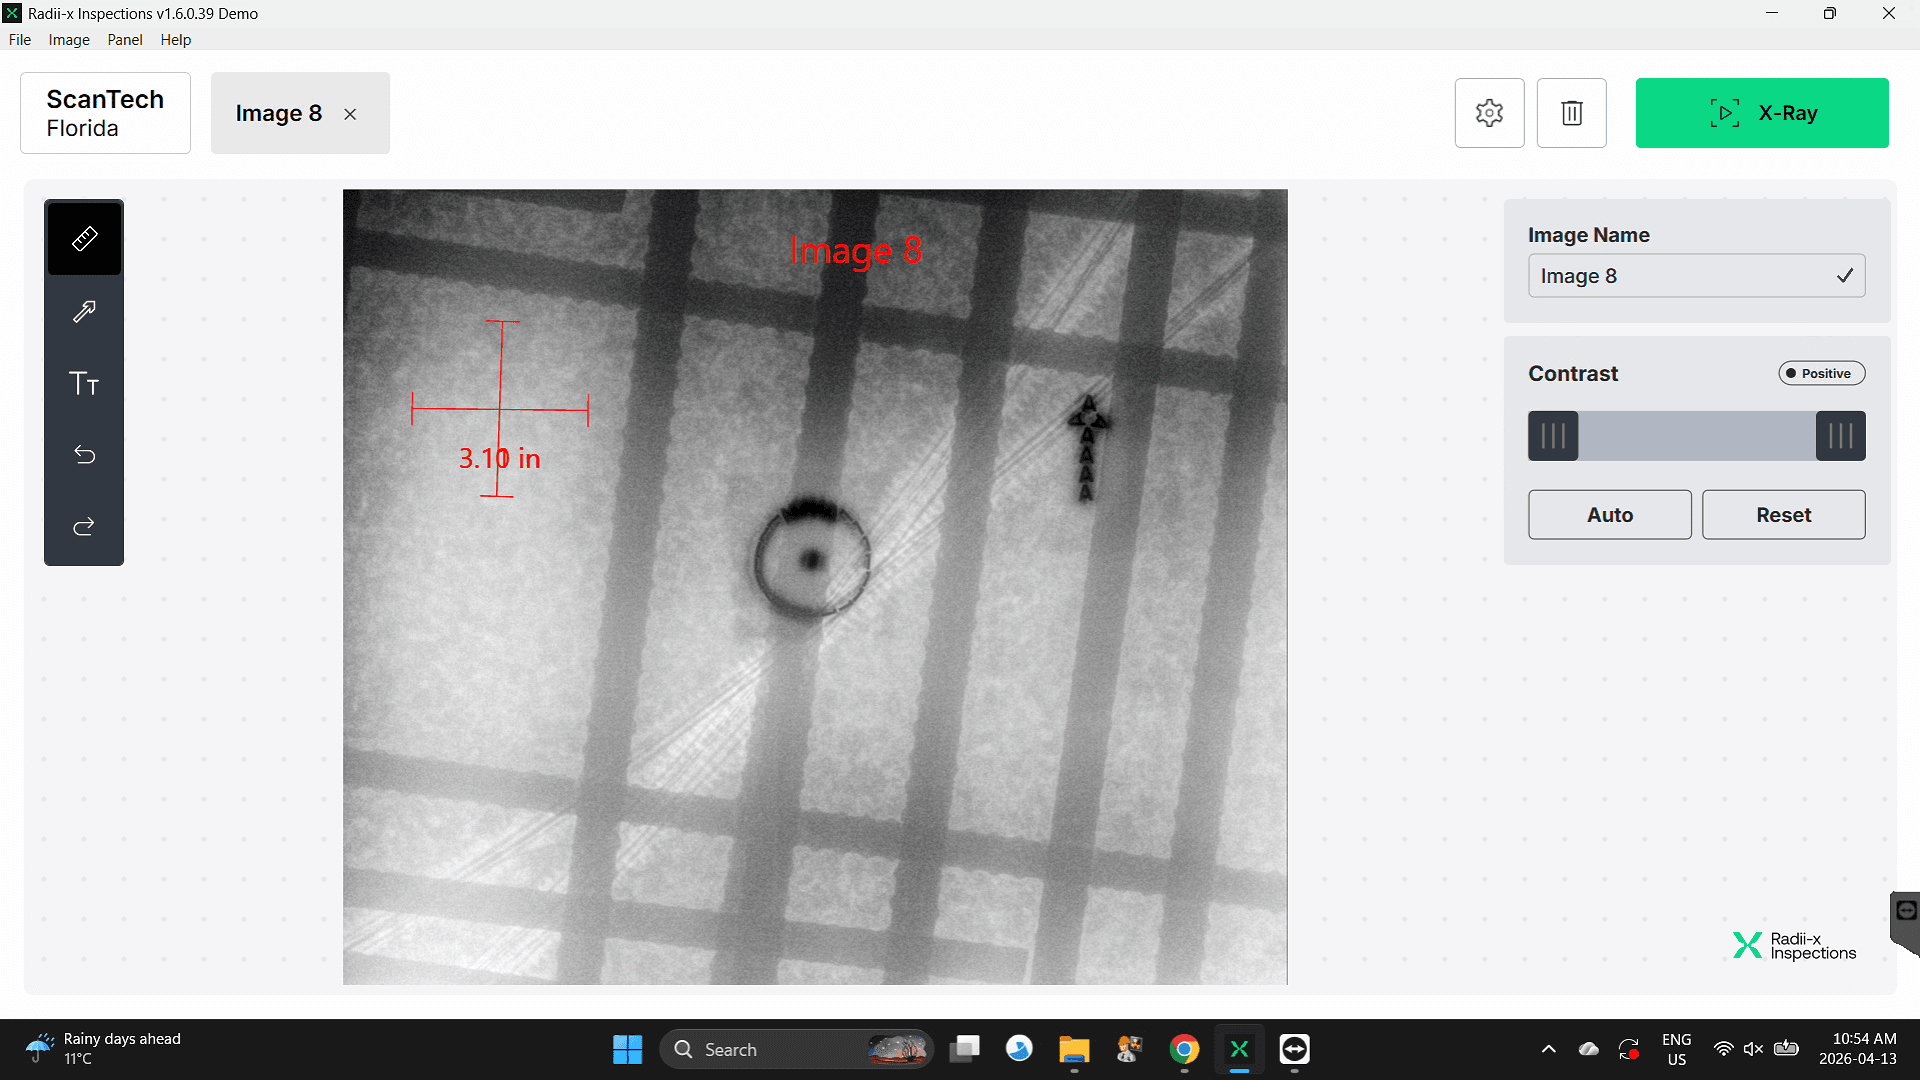
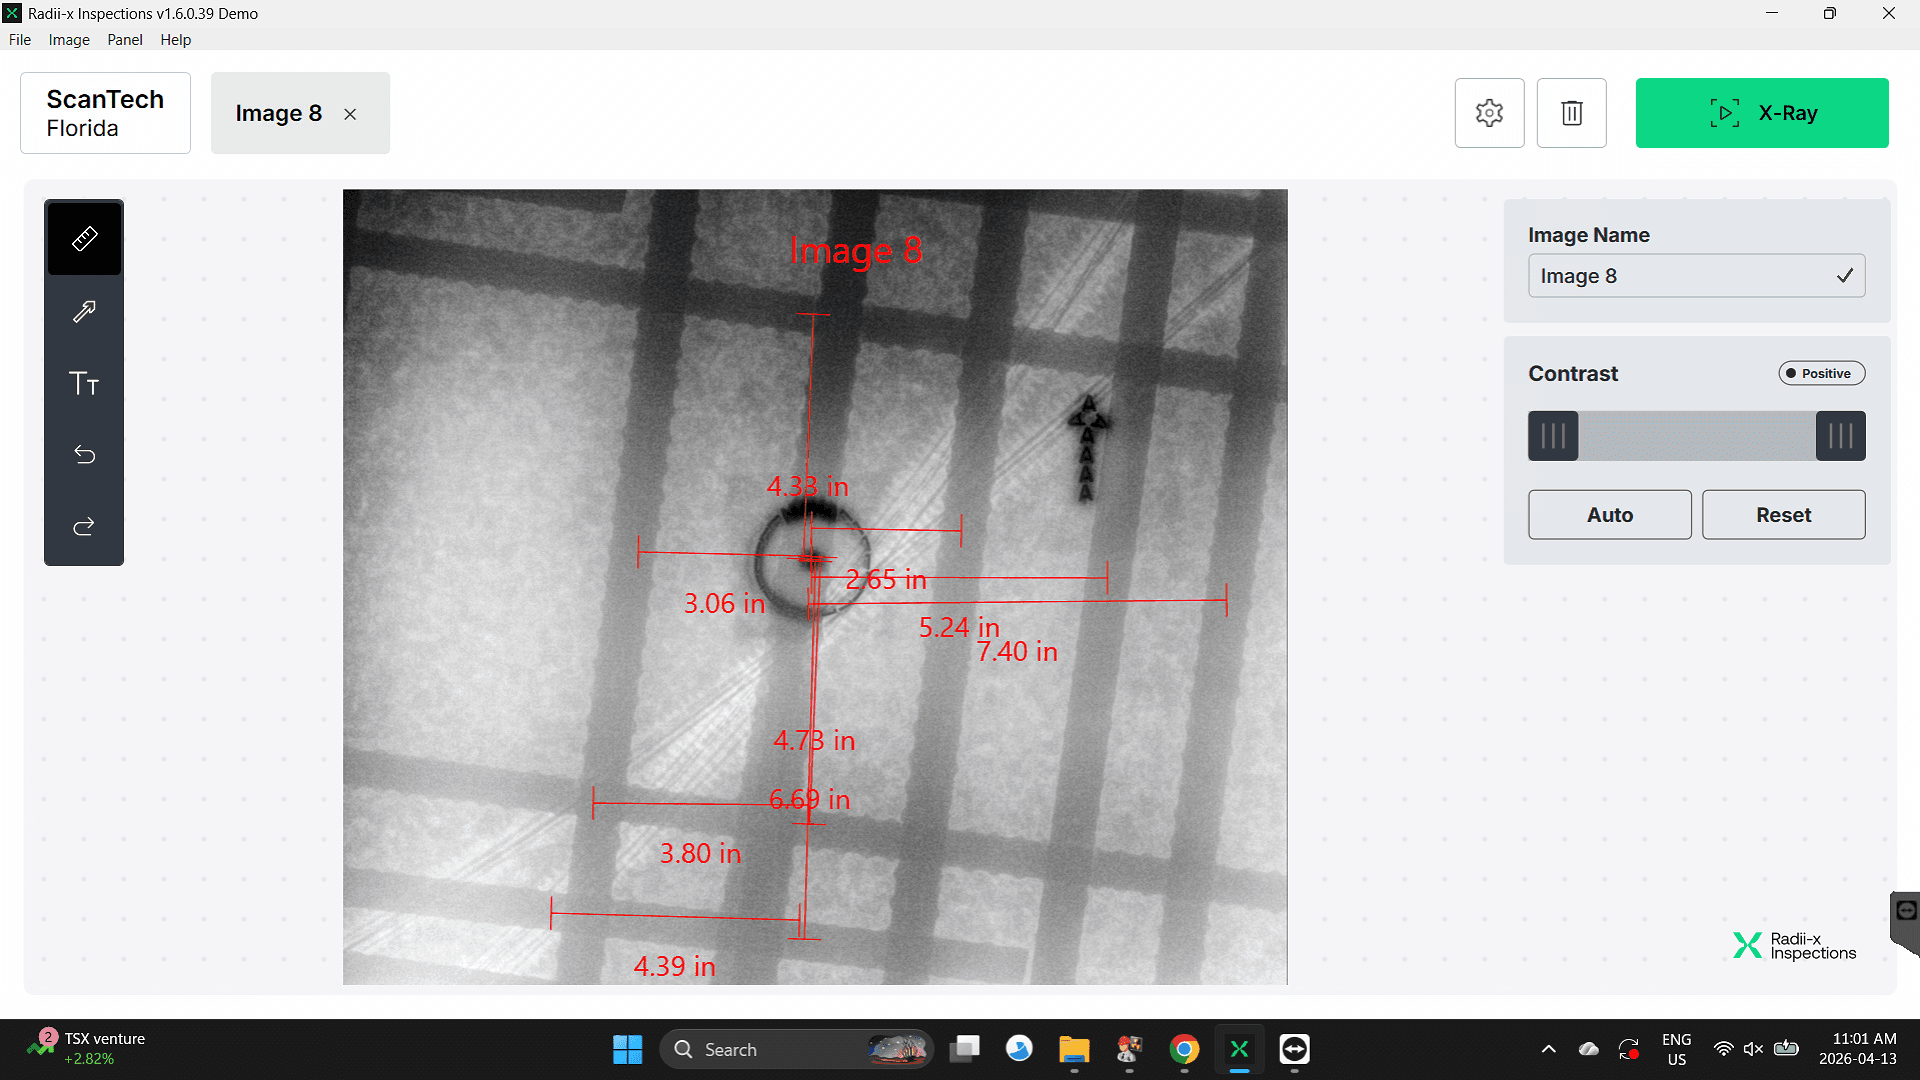
For coring and drilling jobs, interpretation includes a direct assessment: will the planned core fit between the elements without hitting anything? This is why it helps to know the core size before the X-ray begins. Using the measurement tool on the laptop, the technician measures the spacing between elements and checks whether the core fits cleanly. If it does, the location is confirmed. If it does not, the technician looks for an alternative safe spot on the same image before anyone touches the slab.
What Can Go Wrong
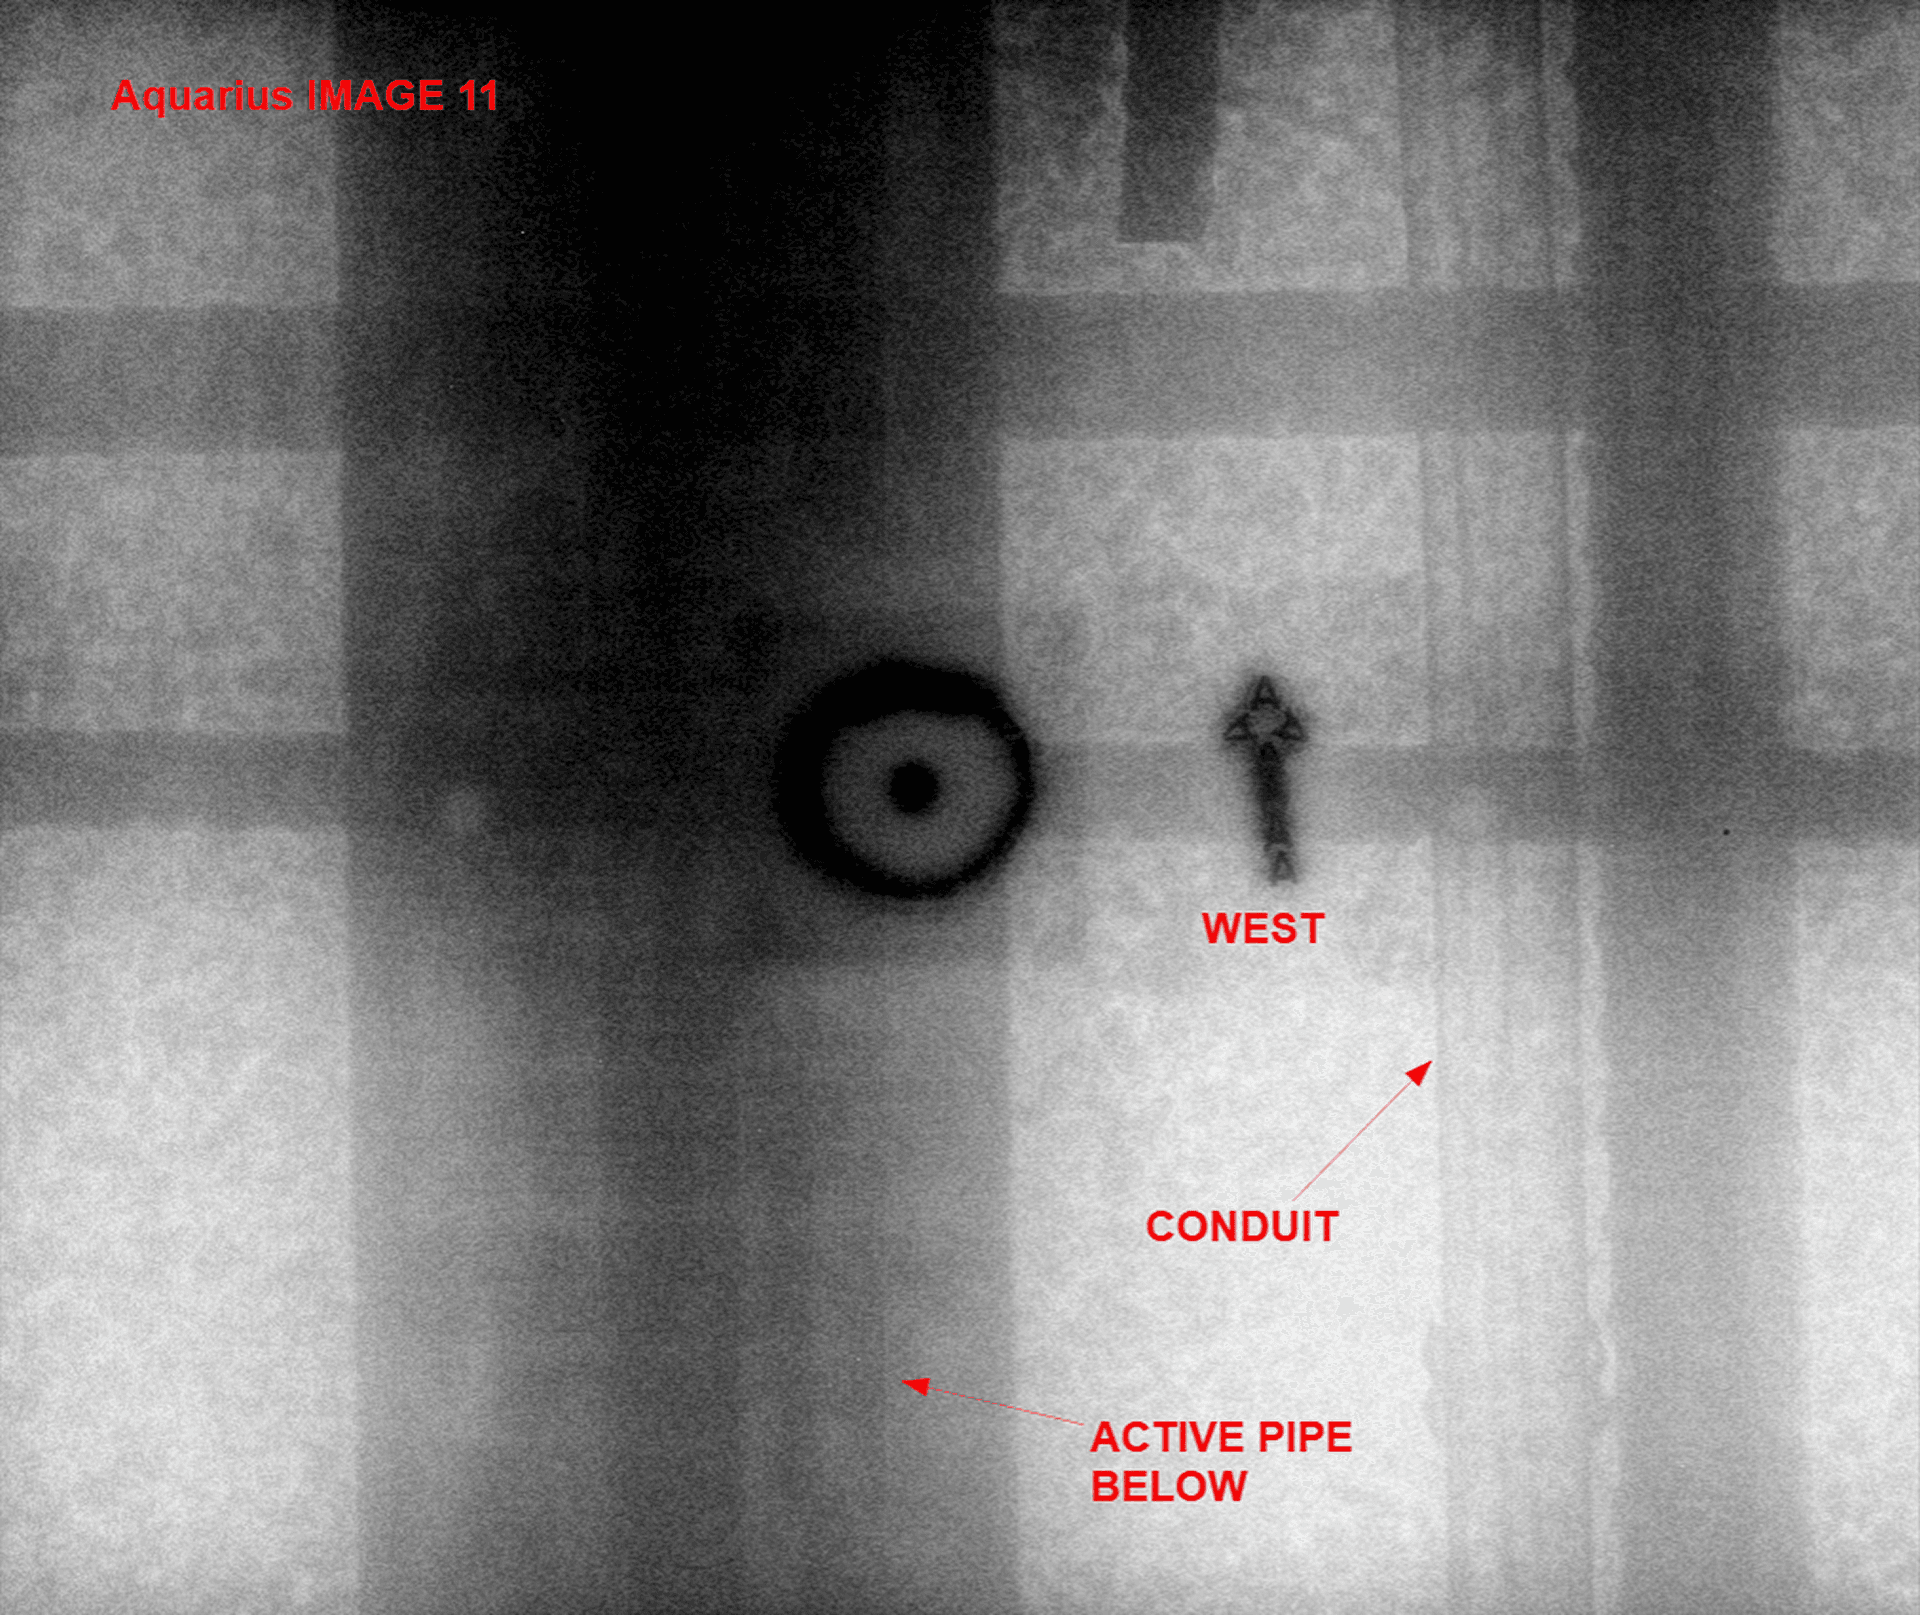
One limitation is worth knowing. Radiation cannot pass through water. If there is an active pipe directly beneath the scan area, that zone will appear black on the image — no data comes through. Most other materials are not a problem: steel, ventilation ducts, conduit, and similar elements all show clearly. When a pipe is present underneath, the right call is to relocate the shot rather than work with an unreadable zone.
Interpretation in digital concrete X-ray does not require years of specialized training. Once a technician has seen the main element types on an image a few times, they can confidently identify even complex scenarios. It is a definitive method. What the image shows is what is there. That reliability is the foundation everything else is built on.
STAGE 2 - Marking
Concrete X-ray marking is the result the client is actually waiting for on site. Once the floor x-ray machine has done its job and the image is on the laptop, the physical marks on the slab are what the coring crew, the engineer, and the GC actually work from. Those marks stay on the concrete after the crew leaves. That is the tangible output of the inspection.
Modern technology has introduced augmented reality — point a phone at the slab and see digital markings overlaid through the camera. It is a genuine advancement. But the industry is not fully there yet. Most engineers and general contractors still want physical marks on the slab. That remains the standard, and it has to be done properly.
How Marking Works Across Methods
The approach to marking is different across all three methods:
GPR: Marking happens during the scan itself. As the construction x-ray machine moves across the surface, the technician marks where the signal indicates an element and connects the lines in real time. Fast, done on the spot.
Traditional film X-ray: Marking cannot happen immediately. The film has to be developed first, then brought back to the site and placed on the ground to mark from. In practice, most traditional X-ray companies skip physical marking entirely — they provide the physical film and reference points, and the general contractor has to lay out the marks themselves. Understandable from a workflow perspective, but not what the client needs.
Digital concrete X-ray: Combines the speed of GPR marking with the accuracy of the concrete x-ray scanner. The image is on the laptop immediately after capture.
The Digital X-Ray Marking Process
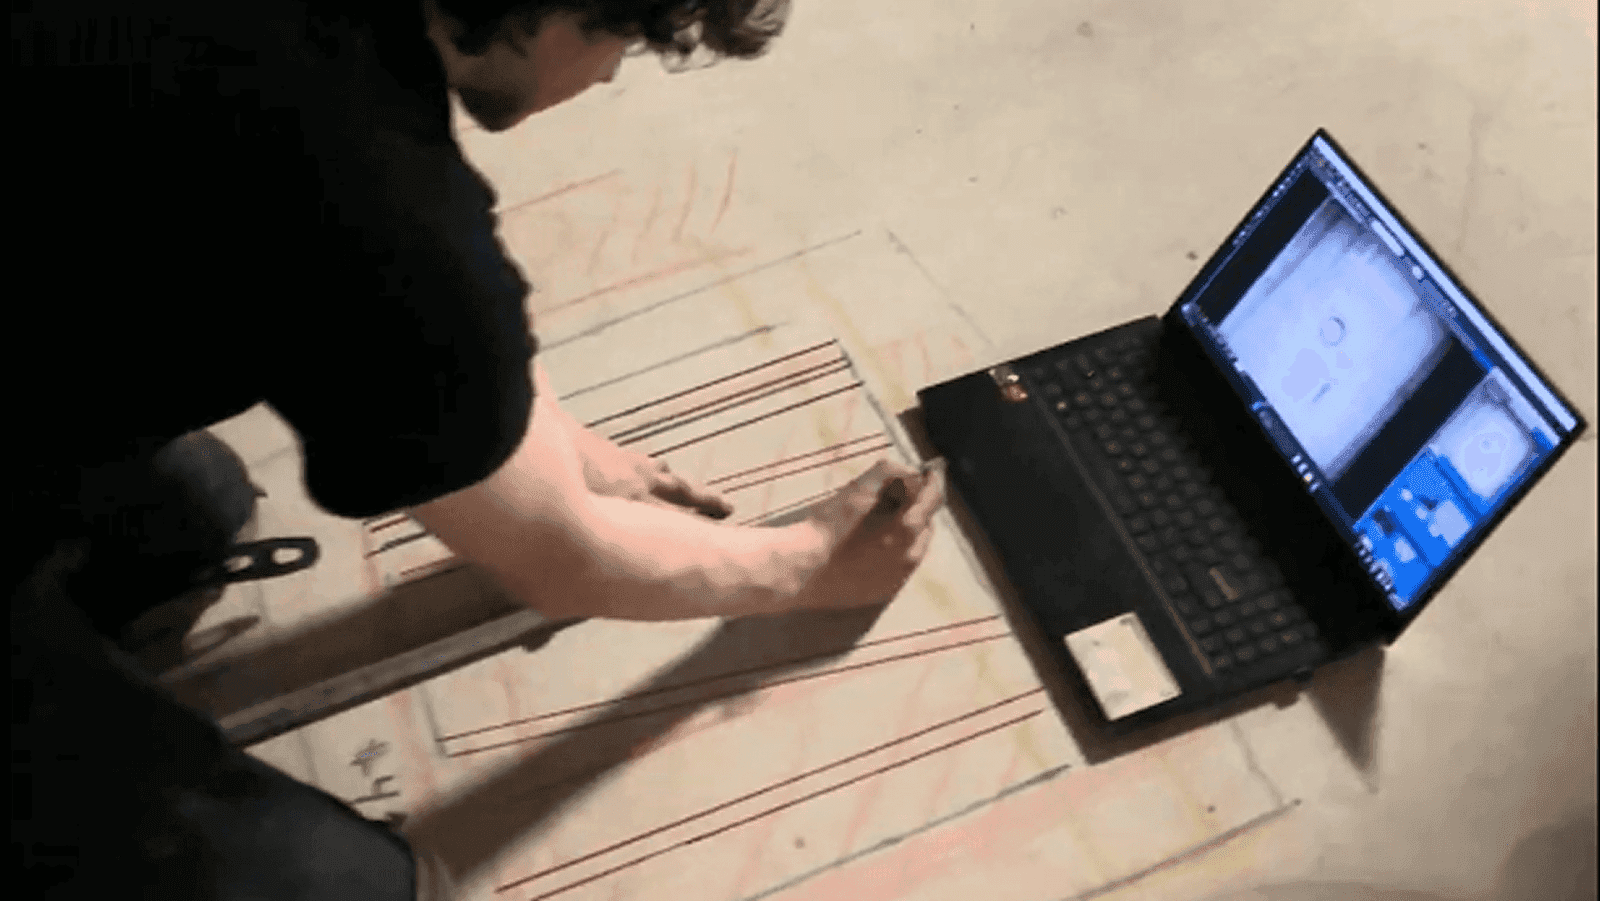
With the image on the laptop, the technician uses the measurement tool to locate each element from a reference point. Before the exposure, a physical label is placed under the panel on the slab — that label appears visibly on the X-ray image and its position is known on the slab. The technician measures the distance from that reference label to each element on the image, then replicates those exact measurements on the slab using a tape measure and marks each position with crayon. The result: accurate physical marks that correspond exactly to what the X-ray showed. GPR speed. X-ray precision. For a full walkthrough of the on-site workflow, see the digital concrete X-ray on-site workflow guide.
Colors and Quality
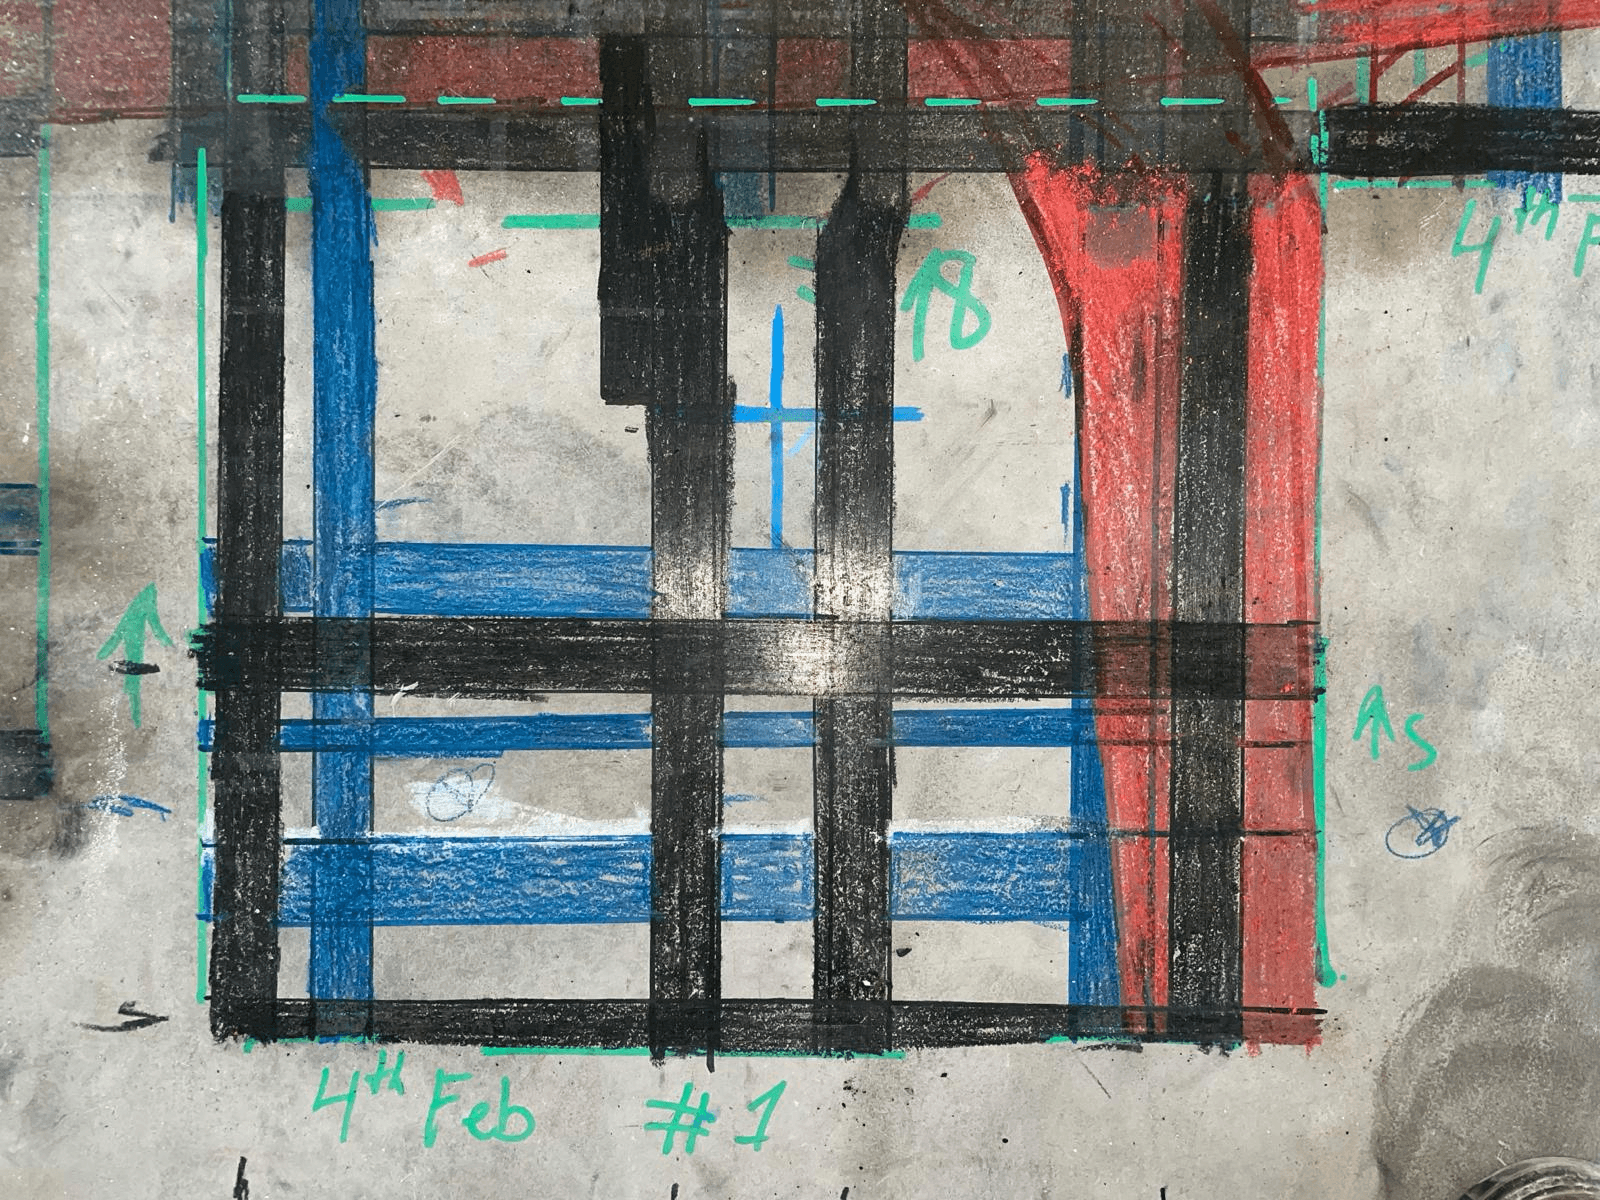
The marks on the slab have to be readable. Not just present — readable. Color conventions matter and should follow intuitive real-world logic:
Red — hazard, do not drill here
Black or blue — structural elements such as rebar
Green — safe spot to core or drill (same logic as a traffic light)
Some companies put marks on the slab that are technically there but hard to interpret — rough lines, inconsistent colors, no labels. Others produce clean, clearly colored, labeled marks. The difference matters because the coring crew works from those marks, often without the technician present. With digital X-ray, the technician knows exactly what is inside before touching the slab. The marking should reflect that clarity.
One Limitation — Depth
X-ray does not provide reliable depth readings for elements. You can sometimes estimate — a denser appearance often means the element is closer to the surface — but this is not a definitive measurement and depends on conditions. When depth is important — for example, when an engineer needs to know whether a bar is a top bar or bottom bar because bottom bars typically cannot be cut for coring — GPR is used alongside digital X-ray specifically to identify element depth when needed.
STAGE 3 - Reporting
Why the Report Matters Beyond the Job
A proper concrete X-ray inspection report is not just a professional courtesy. It is protection. If something gets hit on site — a tension cable, a conduit the client decided to drill through despite the scan result — and there is an investigation, the report is what shows where hazards were clearly marked and what the recommendation was. A vague or incomplete report does not provide that protection. A complete one does.
At the same time, the report is the last thing the client receives. It is the final representation of the company and the quality of the work. The scan result might be excellent. If the report looks like it was assembled in five minutes, that is what the client remembers.
The challenge is getting the technician’s full knowledge into that report. The technician who did the scan knows everything: what was found at every location, where the pipe is underneath that one spot, why a particular location is not safe to core, what that unusual object in the slab is, whether the concrete changes thickness across the scan area. You cannot mark all of that on the slab. Some sites are complex enough that trying to capture every detail in physical marks would create confusion rather than clarity.
Handing raw scan data to the office does not always solve it either — office staff are not typically equipped to interpret scan findings and turn them into a structured client-ready document. And technicians, while highly skilled in the field, are not always set up to produce a polished written report. Without the right tools, that step either takes significant time or gets done poorly. The result is reports that confirm the job happened but do not communicate what was actually found.
What a Complete Report Contains
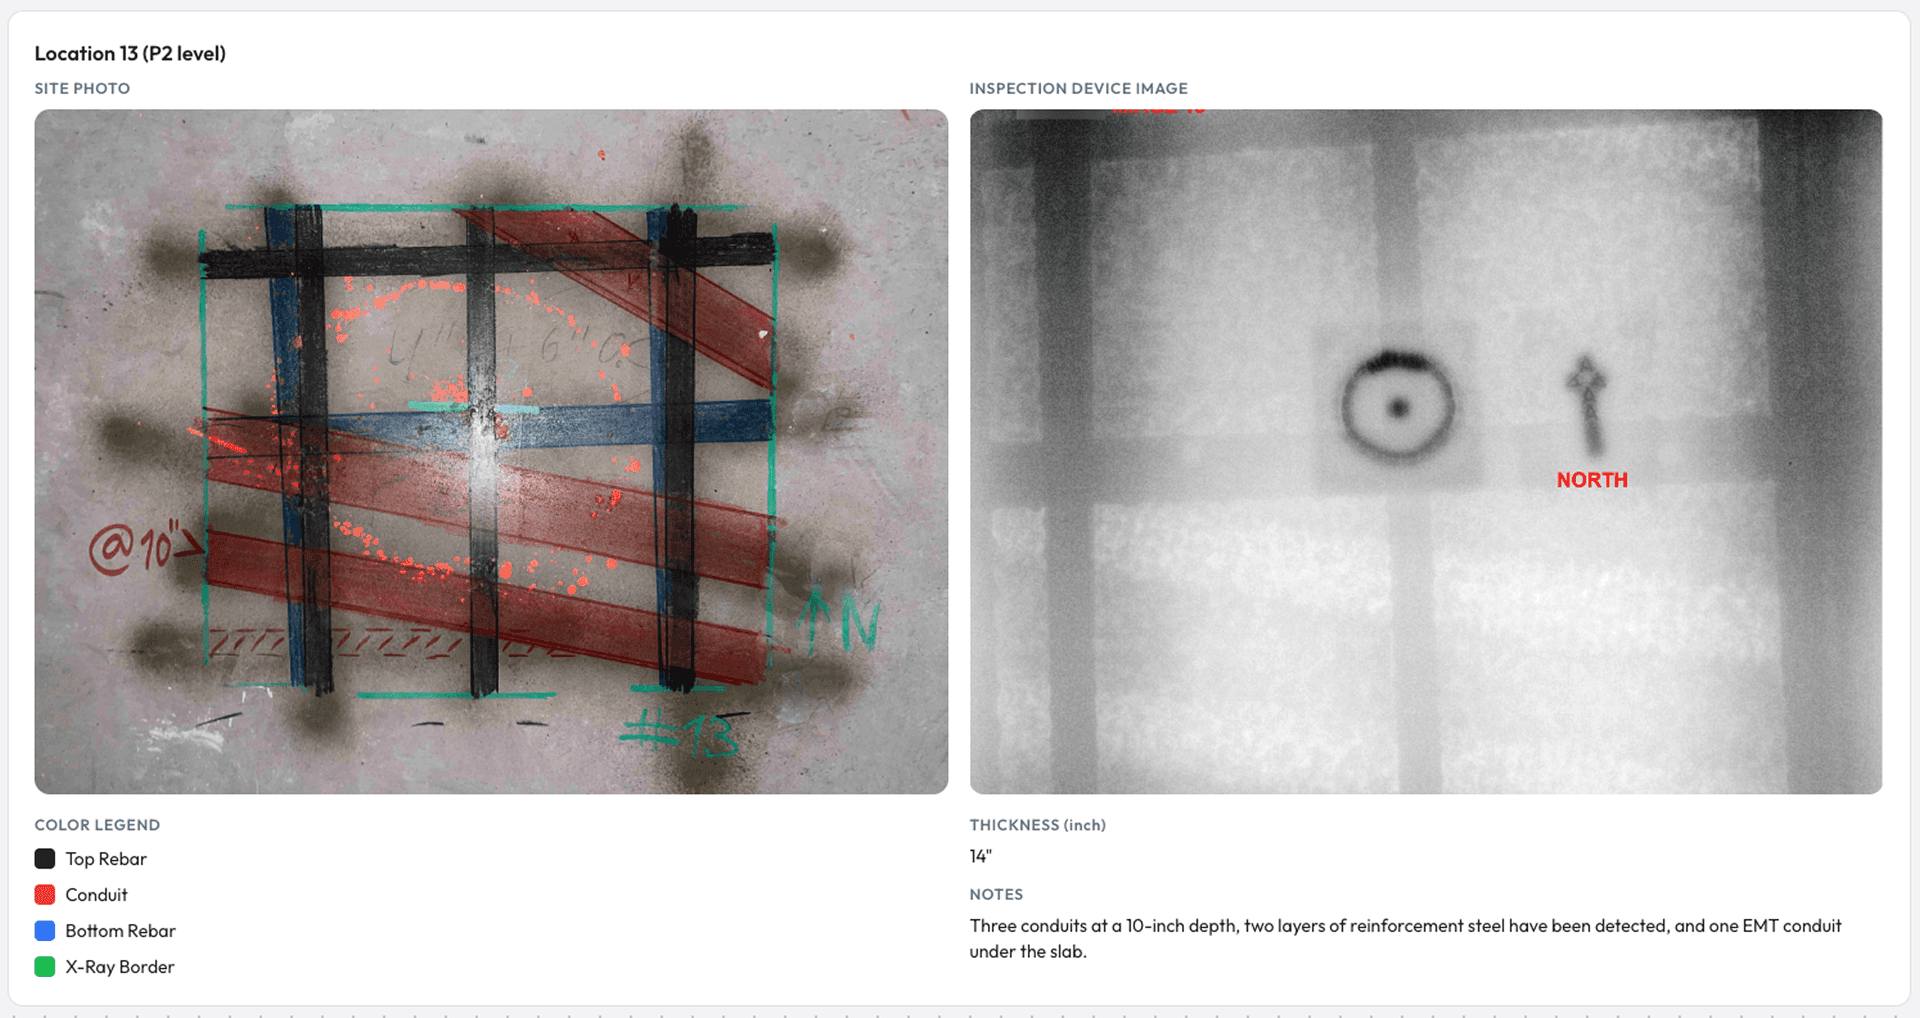
Annotated image for each scan location — marked, labeled, color-coded
Site photo for each location — proof of the physical marks on the slab. This is evidence that GPR cannot provide in the same way: the client can look at the X-ray image and then at the site photo and understand exactly what was found and where, without needing to interpret a signal screen.
Written findings per location — what was identified, element types, positions, recommendations
Reference information — column references, legend, scan parameters, any relevant site conditions
Limitations — anything that could not be confirmed, areas that could not be read, depth not identified, elements flagged as ambiguous
How the Report Gets Built in Radii-x
Reporting through Radii-x concrete scanning reporting software is straightforward and designed to be completed by the technician in the field — no office skills, no complex formatting tools, no prior experience with report writing required. For a full step-by-step walkthrough, see the Radii-x reporting guide.
Inside the software, one button sends all scan data — images, locations, markings — to the report builder automatically. A template is generated with every scan location already populated with its annotated image. From there the technician works through a clear, simple flow:
Add the site photo for each location directly from their phone — via QR code integration, no emailing, no transferring files to a laptop
Add location-specific details: column references, legend entries, notes about site conditions
When the report is ready, the technician submits it. The office receives an email notification, reviews the report, adds any finishing professional wording, and sends it to the client. Field knowledge captured completely. Office quality maintained. No information lost in the handoff.
The Principle That Holds It Together
The image is the evidence. The text is the confirmation. Every finding visible on the annotated image gets stated in writing alongside it — even when it seems obvious. The conduit marked in red on the image still gets named in writing. The rebar labeled on the scan still appears in the written findings. Together, the image and the text create a document that is self-contained.
The GC reviewing it remotely, the engineer approving the next step, the coring crew arriving on site the next morning, someone opening the file six months later with no memory of the project — all of them can read the report and understand what was found, what it means, and what the recommendation is. Without calling the technician. Without needing the original context. That is what a complete digital concrete X-ray report delivers.
The Result Is Built in Post-Processing
A strong result in digital concrete X-ray post-processing is not just about having the right equipment or a clean scan. It comes from two things working together: strong input data and strong post-processing.
Input data is the quality of the scan itself — the right depth, the right exposure, the right coverage for what was requested. Post-processing is everything after: interpretation done accurately, marking done clearly and professionally, reporting done completely. Each stage depends on the one before it. Weak interpretation produces weak marking. Weak marking produces a weak report. And a weak report means the client receives an incomplete result, regardless of how good the scan was.
What the client is paying for is not the scan. It is the answer: what is inside this concrete, where is it, and where can we safely drill or core. That answer only gets delivered completely when all three stages are done properly. When it is, the client gets a result they can act on without follow-up questions. The coring crew works confidently. The engineer approves without back-and-forth. And the client calls again.
Digital concrete x-ray equipment gives companies the tools to produce that kind of result. The image is real, interpretation is definitive, marking is precise, and reporting can be built efficiently with the right software. But the technology creates the possibility — not the guarantee. The technician’s skill and the company’s standards determine whether that possibility becomes the result the client actually receives. Read more about how purpose-built digital X-ray unlocks growth for coring companies.
Ready to Put It Into Practice?
The workflow exists. The tools exist. The question is whether your post-processing reflects the quality of your scan.
If reporting is where your process slows down — building documents manually, formatting images, writing findings from scratch every time — Radii-x is built to solve that. The Radii-x report workflow is designed specifically for digital concrete X-ray: one button to start, technician-friendly flow, professional output every time. Try the report template and see how it works in practice.
And if you want to see the full digital concrete x-ray equipment and post-processing workflow live — from image capture through interpretation, marking, and final report — book a demo. A practical walkthrough of the complete system from start to finish, so you can see exactly what is possible before making any decision.